















MICRO TIMELINE COMMANDER / VER 1.0.7 / FOR BLENDER 5.1 & 5.2
タイムラインをもっと軽快に Effortless Timeline Control

PP-01 PocketPilot - Micro Timeline Commander

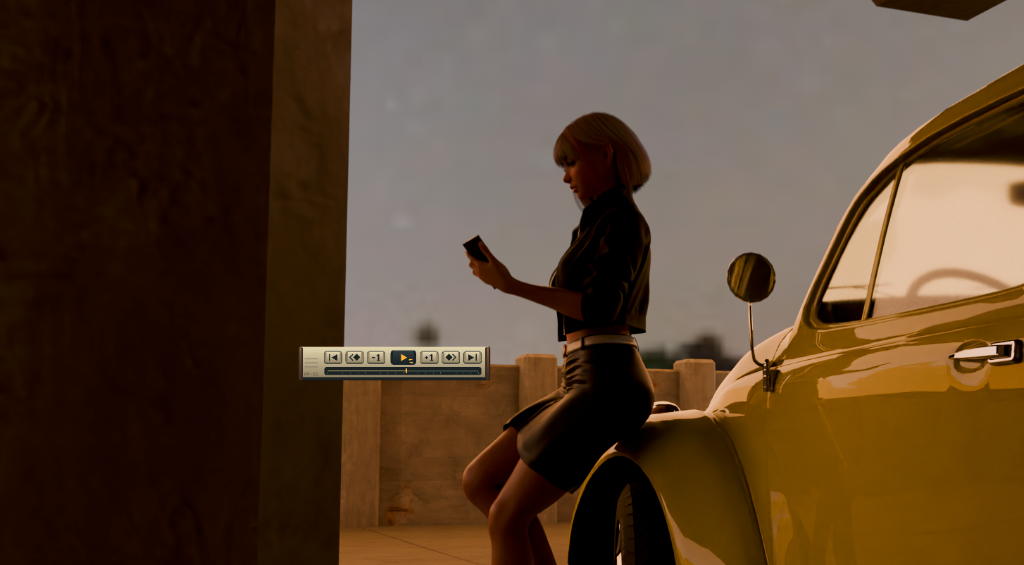
ちょっと動きを確認したい。そのための、小さなリモコンです。 「PP-01 PocketPilot」は、3Dビューポート内に浮かび、モデルの近くに置いて再生やコマ送りができるコンパクトなコントローラーです。 A small remote for those moments when you just want to check the motion. PP-01 PocketPilot is an ultra-compact floating transport controller designed for effortless playback and scrubbing directly inside Blender's 3D Viewport.

PP-01 in 3D Viewport
3Dビューポート内の常駐リモコンFloating Remote inside Viewport VINTAGE CREAM
実機操作デモ(全画面ノーカット・移動 & スクラブ)Live Demo (Full Uncropped View) BLENDER 5.1 / 5.2
QUICK START

インストールと呼び出し Installation & Setup

01

ZIPのままインストール Install from ZIP

Blender 5.1 または 5.2 の「編集 → プリファレンス → アドオン」を開き、右上の「ディスクからインストール」で PP-01_PocketPilot_1.0.7.zip を指定します(解凍不要)。 Open Preferences > Add-ons, click "Install from Disk" and select PP-01_PocketPilot_1.0.7.zip (no unzipping required).

02

アドオンを有効化 Enable Add-on

リストに表示された「PP-01 PocketPilot — Micro Timeline Commander」のチェックボックスをONにして有効化します。 Check the box next to "PP-01 PocketPilot — Micro Timeline Commander" to activate.

03

3Dビューからワンタップ Toggle in 3D View

3Dビューポートのヘッダー右上にある PP-01 ボタンを押すか、F3 キーで「PocketPilot」と検索するだけでいつでも即座に表示/非表示を切り替えられます。 Click the PP-01 button in the 3D Viewport header, or press F3 and search "PocketPilot" to toggle instantly.

動作確認済み:macOS/Windows、Blender 5.1.2・5.2.2 LTS。すべてのGPU・表示倍率での動作を保証するものではありません。Tested: macOS and Windows with Blender 5.1.2 and 5.2.2 LTS. Not every GPU or display scaling setting has been tested.

大きさを変える:アドオンのプリファレンスで「サイズ」を調整します。パネルが見えない場合は、3Dビューのギズモ表示がONになっているか確認してください。Resize the remote: adjust “Size” in the add-on preferences. If the panel is hidden, check that gizmos are enabled in the 3D Viewport.

CONTROLS & CALLOUTS

各部操作ガイド Controls & Callouts

PP-01の各パーツに割り当てられた機能と、直感的なショートカット操作の全貌です。 A complete guide to each control and intuitive shortcut mapped on the PP-01 remote.

1 2 3 4 5 6 7 8 9
1
左ドラッグ / 右クリックDrag / Right Click

移動ハンドル (PP-01)Move Handle

左ドラッグで3Dビューポート内の好きな位置へ移動。右クリックで瞬時にパネルを非表示にします(移動中にEscで元の位置へ復帰)。Left Drag to move freely within viewport bounds. Right Click to instantly hide the panel (Esc cancels to original position).

2
左クリックLeft Click

先頭フレームへジャンプ (|◀)Jump to Start

再生範囲(プレビュー範囲有効時はその開始フレーム)の先頭へ一瞬で移動します。Instantly jumps to the start frame of playback range (respects preview range).

3
左クリックLeft Click

前のキーフレーム (◆◀)Previous Keyframe

選択中のオブジェクトやボーンの、現在より前にある直近のキーフレームへ移動します。Jumps backward to the nearest keyframe of selected objects/bones.

4
左クリックLeft Click

1フレーム戻る (-1)Step Back -1 Frame

1フレームだけ前に戻すコマ送り。ポーズやタイミングの微調整に最適です。Step backward by exactly 1 frame for frame-accurate timing checks.

5
左クリック / 右クリックLeft Click / Right Click

再生・停止 & ループ切替Play / Pause & Loop Toggle

左クリックで再生/一時停止。右クリックでループON/OFFをトグル。ON時はボタン右下にループ印が点灯し、OFF時は範囲末尾で自動停止します。Left Click to Play/Pause. Right Click to toggle Loop mode. When active, the loop icon lights up; when OFF, playback stops at range end.

6
左クリックLeft Click

1フレーム進む (+1)Step Forward +1 Frame

1フレームだけ先に進めるコマ送り。Step forward by exactly 1 frame.

7
左クリックLeft Click

次のキーフレーム (▶◆)Next Keyframe

選択中のオブジェクトやボーンの、現在より後にある直近のキーフレームへ移動します。Jumps forward to the nearest keyframe of selected objects/bones.

8
左クリックLeft Click

末尾フレームへジャンプ (▶|)Jump to End

再生範囲(プレビュー範囲有効時はその終了フレーム)の末尾へ一瞬で移動します。Instantly jumps to the end frame of playback range.

9
クリック / ドラッグClick / Drag

タイムラインスライダー(自由スクラブ)Timeline Scrubbing Slider

再生範囲内をクリック/ドラッグしてフレームを移動します。プレビュー範囲が有効なら、その範囲を使います。再生中に触れると安全に自動停止し、マウスを離したフレームに留まります。スクラブ中にEscまたは右クリックを押すと、開始前のフレームへ即座に戻します。Click or drag to scrub within the playback range, or the preview range when enabled. Scrubbing safely halts playback automatically. Pressing Esc or Right-click restores the original frame immediately.

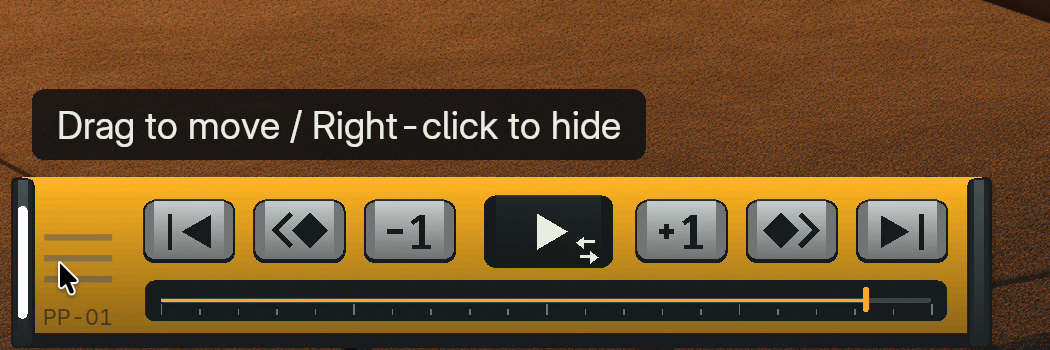
Move Handle Tooltip

① 左端つまみのホバーヒントMove Handle Tooltip

左側の移動領域にカーソルを合わせると、左端がほのかに光り、移動と非表示のヒントが表示されます。表示言語はBlenderのインターフェース翻訳設定に従います。Hover over the left grip to softly illuminate the left edge and show “Drag to move / Right-click to hide.” The hint follows Blender’s interface translation settings.

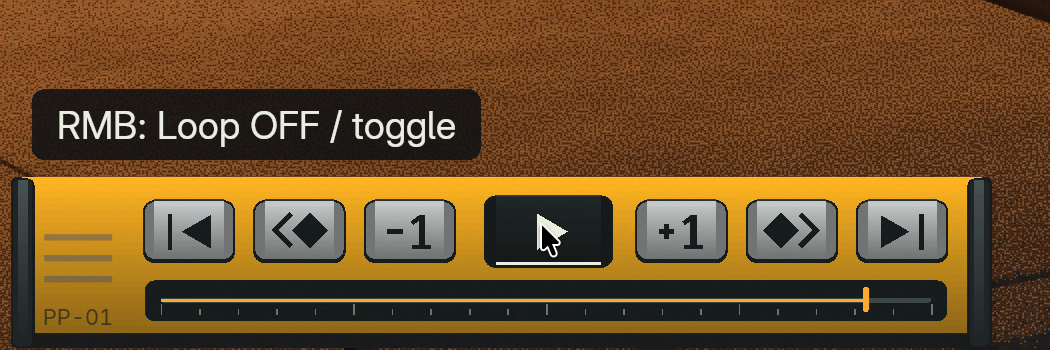
Loop Toggle Tooltip

⑤ 再生ボタンのループ切替ヒントLoop Toggle Tooltip

再生ボタンにカーソルを合わせると、現在のループ状態(ON/OFF)と右クリックのヒントを表示します。右クリックで切り替えられます。Hover over Play to see the current loop state (ON/OFF). Right-click to switch it.

作業に必要な操作だけを:再生、コマ送り、キーフレーム移動を小さなパネルにまとめました。Blender標準のショートカットも引き続き使えます。 Keep the essentials close: Playback, frame stepping, and keyframe navigation in one small panel. Blender’s standard shortcuts remain available.
SKIN PRESETS

全15種類のスキンプリセット All 15 Factory Preset Skins

アドオン設定(プリファレンス)からワンクリックで切り替えられる全15種類のスキン一覧です。 All 15 built-in hardware finishes and CinemaOperator flat themes selectable in Add-on Preferences.

VINTAGE CREAM
VINTAGE CREAM 木製サイドパネル仕様Wood Side Panels
STUDIO SILVER
STUDIO SILVER スタジオシルバーStudio Metal
GRAPHITE
GRAPHITE ダークグラファイトGraphite Matte
MIDNIGHT BLUE
MIDNIGHT BLUE ミッドナイトブルーDeep Blue
FIELD OLIVE
FIELD OLIVE フィールドオリーブField Olive
DAVE
DAVE 山吹シンセサイザーAnalog Synth
TOKUGAWA ELECTRONICS
TOKUGAWA ELECTRONICS ブラック×ライムグリーンOfficial Lime
nord
nord ステージレッドStage Red
THEME · MONO
THEME · MONO フラットモノトーンFlat Monochrome
THEME · PAPER
THEME · PAPER クリーンペーパーClean Paper
THEME · NEON
THEME · NEON サイバーネオンCyber Neon
THEME · BLUEPRINT
THEME · BLUEPRINT ブループリントBlueprint
THEME · MOSS
THEME · MOSS モスグリーンMoss Green
THEME · EMBER
THEME · EMBER エンバーウォームEmber Warm
THEME · MONO COLOR
THEME · MONO COLOR モノカラー・シアンCyan Accent
ADVANCED CUSTOMIZATION

カラーカスタム & 表面PNGオーバーレイ Color Tuning & Surface PNG Decals

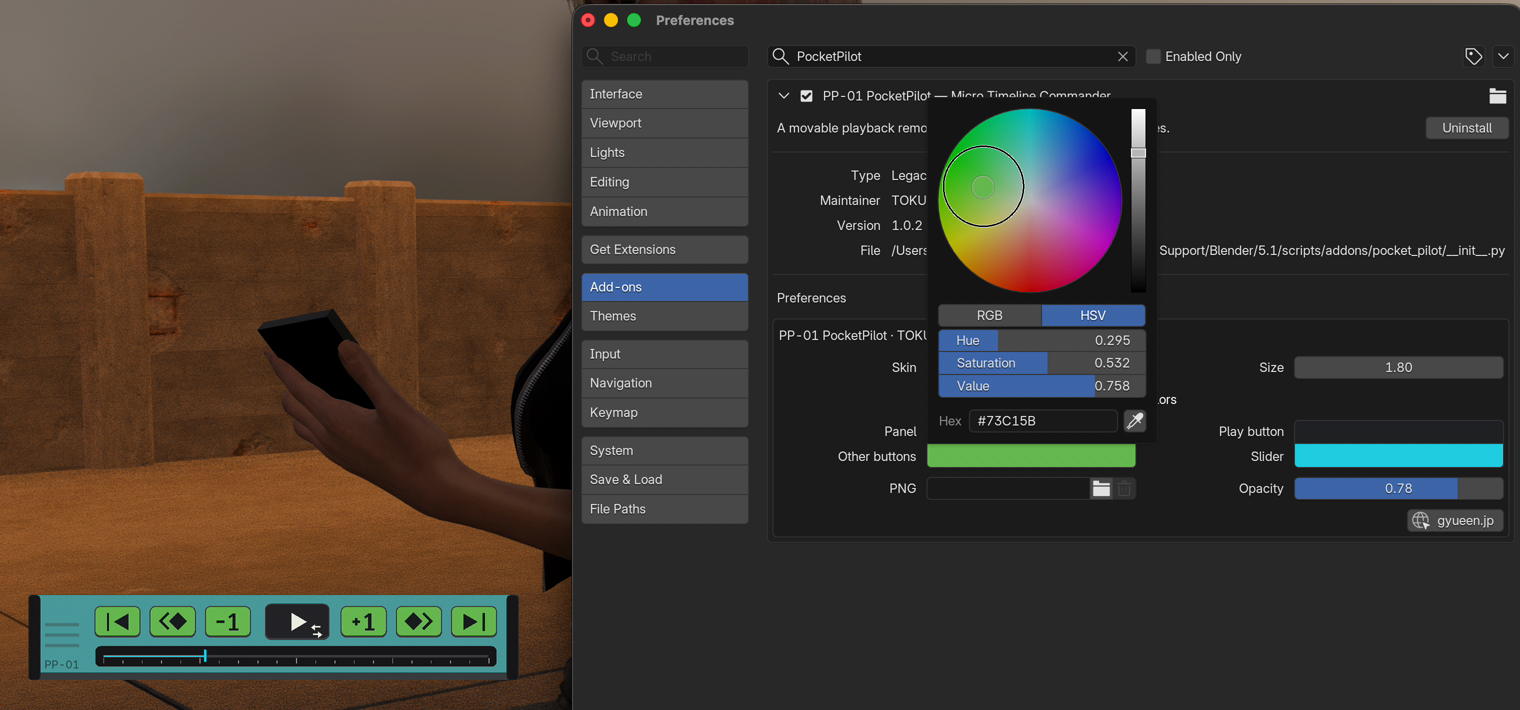
PP-01 Color Customization

自由なカラーカスタムCustom Colors

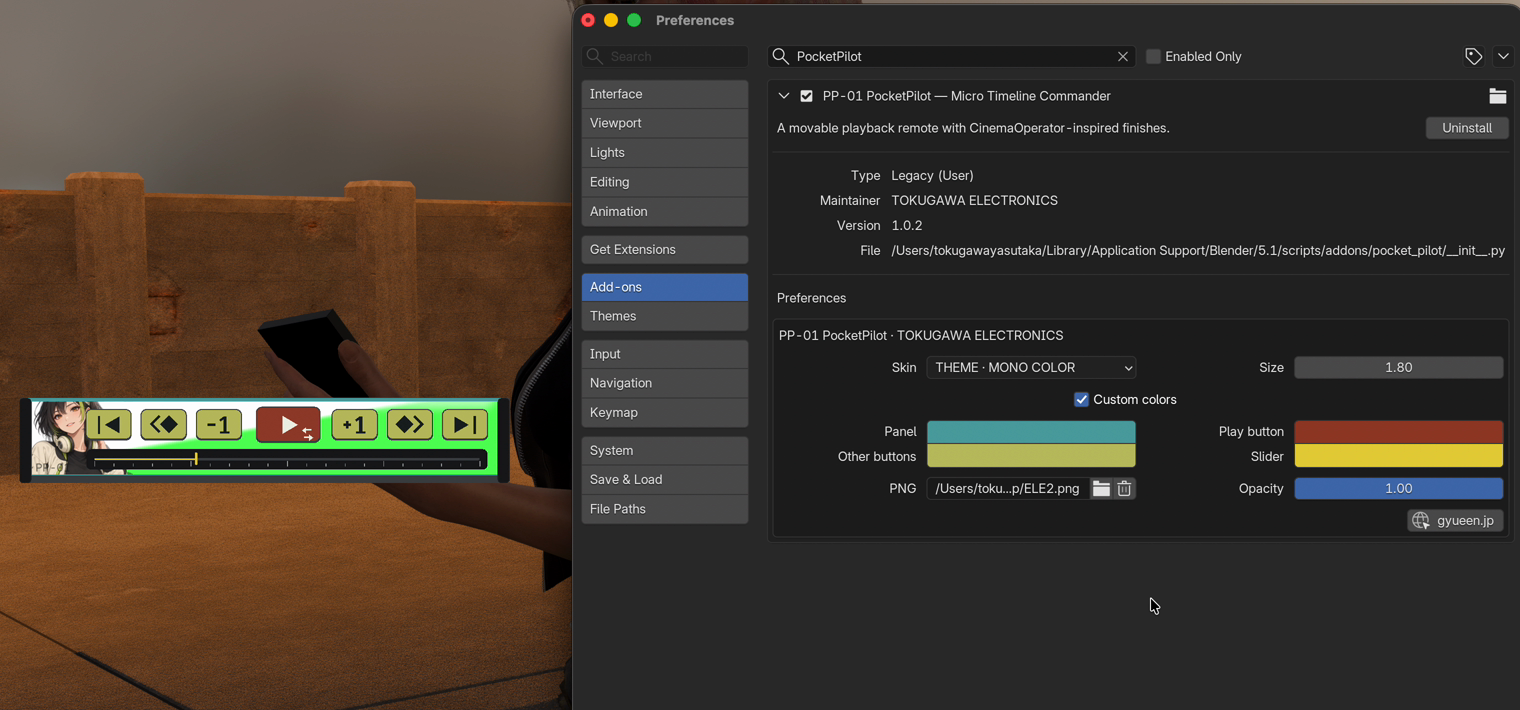
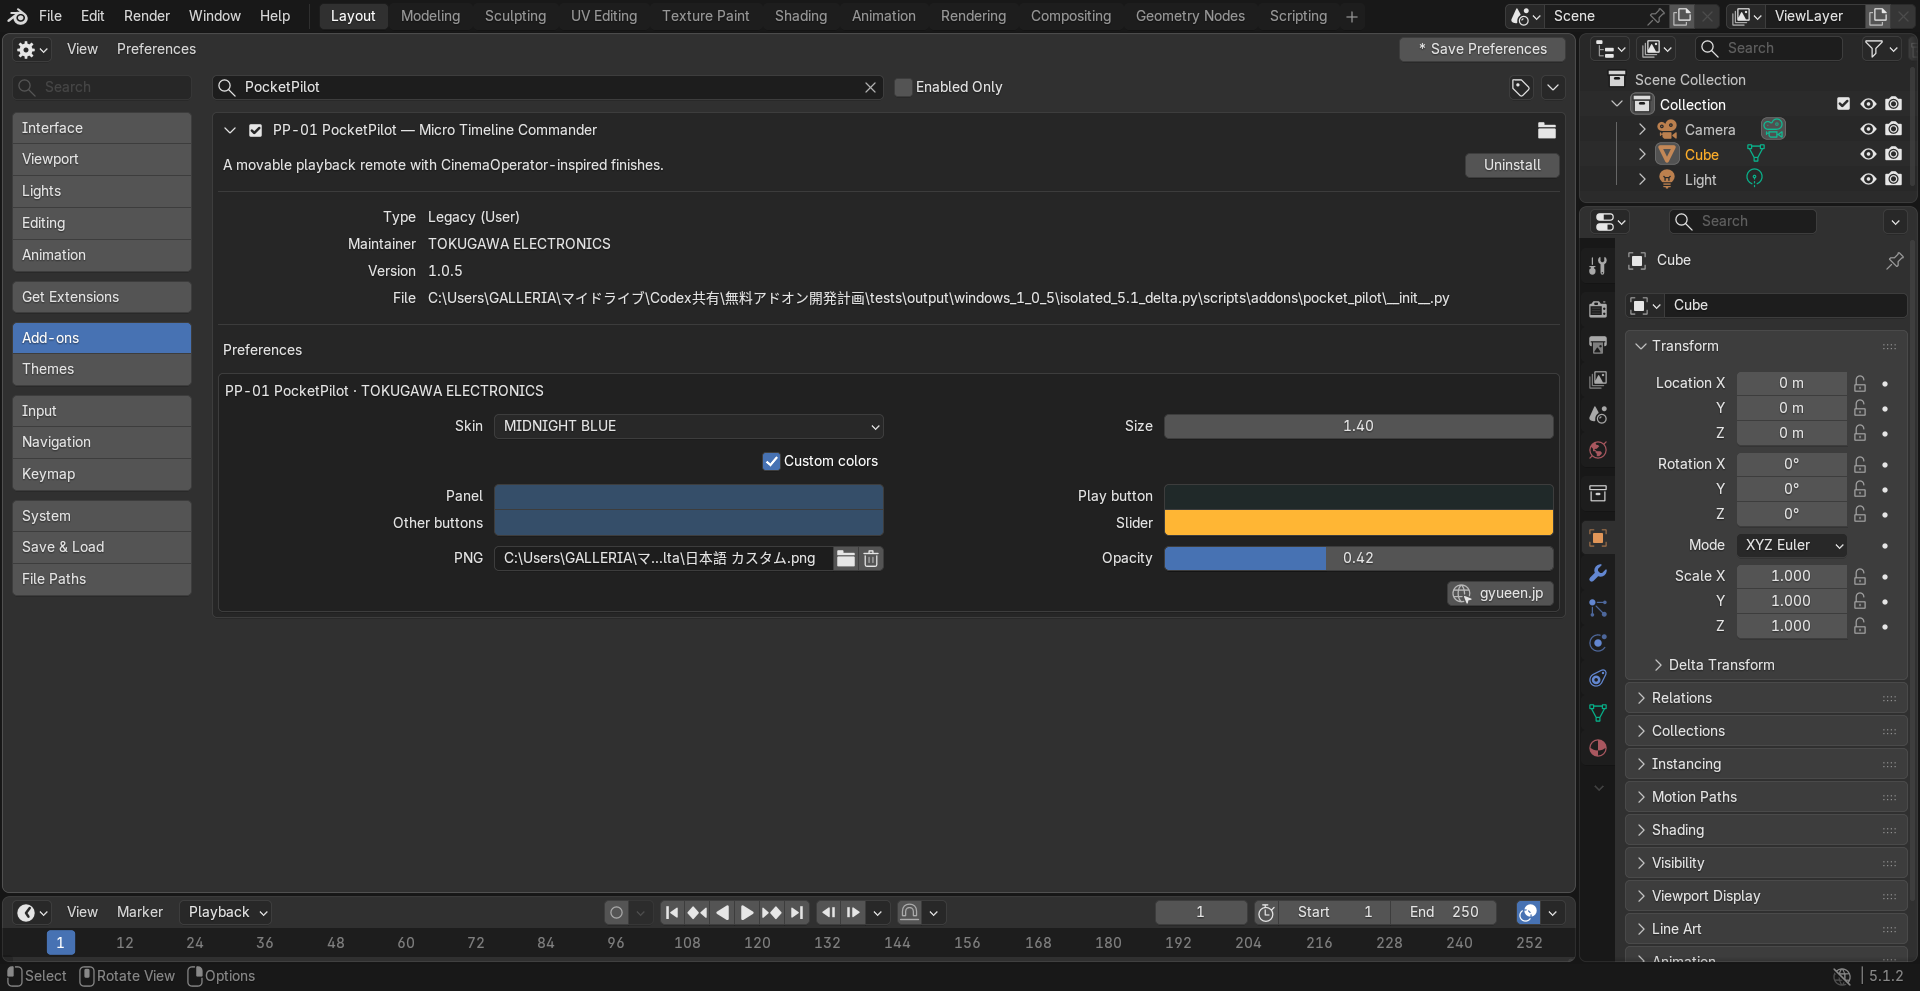
プリファレンスの「Custom colors(色をカスタム)」をONにすると、パネル本体、再生ボタン、その他のボタン、スライダーの色をカラーピッカーで個別に調色できます。ボタン文字・アイコンの明暗は背景色に合わせて自動調整されます。Enable "Custom colors" in Preferences to freely dial in custom hues for the Panel, Play button, Other buttons, and Slider via color pickers with automatic icon contrast.

PP-01 Character PNG Overlay Settings

表面画像(PNG)でオリジナル機材へSurface PNG Overlay

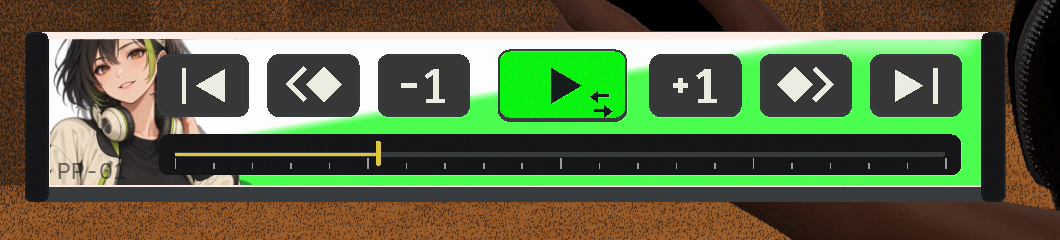
配布ZIPの pocket_pilot/templates/ に同梱されているガイドを使って 892 × 140 px(比率 223:35)の透過PNGを作成し、プリファレンスの「PNG」欄で指定するだけで、キャラクターイラストやロゴを筐体天板に美しく重ね合わせられます。Using the included templates in pocket_pilot/templates/, load any 892 × 140 px (223:35) transparent PNG to overlay custom character illustrations or brand decals onto the chassis.

Custom Character PNG Overlay Closeup
表面PNGオーバーレイ + カスタムカラーを組み合わせたオリジナルデザイン作例(ボタンやスライダーは常に画像の手前に描画されます) Example of a custom character PNG overlay combined with custom button colors (controls always render cleanly above the artwork).
PP-01 1.0.5 preferences on Windows

PNGの使い方と、標準に戻す方法Using a PNG and restoring the default

  1. 標準では三本線の透過PNGを表示します。「PNG」欄のフォルダから好きな画像を選ぶと置き換わります。画像を変えても左側の移動操作は同じです。The default is a transparent three-line grip image. Choose your own PNG with the folder button to replace it. The left grip remains draggable.
  2. 「濃さ」で画像の不透明度を調整します。1.0では画像本来の色と透明度を表示し、値を下げるとパネル色と混ざります。“Opacity” controls the image strength. At 1.0, the PNG retains its original color and transparency; lower values blend it with the panel color.
  3. ゴミ箱を押すと標準の三本線へ戻ります。元のPNGファイルは削除されず、スキン・カスタム色・濃さも保持されます。Click the trash icon to restore the default grip. Your PNG file, skin, custom colors, and opacity setting are preserved.

画像を読み込めない場合:指定したPNGが見つからない・破損している場合は、プリファレンスに警告を表示して標準の三本線へ戻ります。標準の三本線は「濃さ」が0でも表示されます。入力したパスは保持されるので、画像を復旧して選び直すか、ゴミ箱で指定を解除してください。If a PNG cannot be loaded: a missing or unreadable PNG shows a warning in Preferences and falls back to the default three-line grip. The default grip remains visible even at zero custom opacity. Your path is retained; restore and reselect the file, or use the trash icon to clear it.

画像を作るとき:892 × 140 px・sRGBを推奨。透過PNGも使えます。同じ比率なら全体を表示し、異なる比率は中央でトリミングします。同梱ガイドは書き出す前に非表示にしてください。画像は外部ファイル参照のため、選択後に移動・削除すると読み込めなくなります。Creating artwork: use 892 × 140 px in sRGB; transparency is supported. Matching aspect ratios display in full; other ratios are center-cropped. Hide the template guides before export. PNGs are referenced externally, so keep the selected file in place.

カスタム色をONにしたときや、ONのままスキンを切り替えたときは、各色がそのスキンの初期色に戻ります。Enabling Custom colors, or changing skins while it is enabled, resets the color controls to that skin’s defaults.

MORE FROM TOKUGAWA ELECTRONICS

制作を助ける、ほかの道具。More tools for your creative workflow.

「頭の中では簡単なのに、操作が面倒。」そんな制作中のひと手間を減らすためのBlenderアドオンです。Blender add-ons built to simplify the small tasks that interrupt your creative flow.

Panel Line Designer
HARD-SURFACE DETAILING

Panel Line Designer

スジ彫りが入ると、急にうまくなった気がする。Give your model the detail it deserves.

選択したエッジに沿って、立体的なスジ彫りを生成。幅や深さ、プロファイルを調整しながら、メカやプロダクトのディテールを作れます。Create geometric panel grooves along selected edges. Adjust width, depth, and profile to detail mechanical and product models.

Superhiveで詳しく見る ↗Explore on Superhive ↗

CinemaOperator
CAMERA CONTROL

CinemaOperator

アタマの中を、3DCGの都合に合わせるな。Direct your camera like a filmmaker.

カメラの位置や画角、軌道、複数カメラの切り替えを操作卓の感覚でコントロール。PP-01の外観やスキンも、CinemaOperatorのデザインを受け継いでいます。Control framing, camera paths, and multi-camera switching with a console-inspired interface. Its design and skin palettes also inspired PP-01.

Superhiveで詳しく見る ↗Explore on Superhive ↗
LOGOBLOCKS
3D LOGO DESIGN

LOGOBLOCKS

ロゴに、重ねるフチとベベルの表情を。Build your logo with layered rims and bevels.

SVGやBlenderのテキストから立体ロゴを制作。前面と複数のフチに形状や色を設定し、ベベルを組み合わせられます。書き出したロゴには、専用の照明や表面効果を追加できます。Build 3D logos from SVG artwork or Blender text. Combine a face with multiple rims, adjusting their shapes, colors, and bevels. Add dedicated lighting and surface effects to the exported logo.

公式サイトで詳細を見る ↗Visit the official website ↗